Showing posts with label Star Trek costume. Show all posts

October 19, 2015

Tips for Achieving an Ideal Fit

The sizes available on the printed pattern should accommodate most body builds, but some customizing may be needed in order to achieve an ideal fit. 


Perhaps most likely to need adjustment is the collar, as it may be slightly too tight or too loose for comfort around the wearer's neck. It should be snug-ish but not uncomfortably tight. 

Our pattern's collars are graded in increments of 1", starting with 14 ½" for the size small.

Altering the collar is a two-step process: altering the collar and altering the neckline. 

The most effective (er, only?) ways to loosen the collar are to extend the front or back by half the amount of the desired adjustment - for instance, if you need to loosen the collar by ½", simply extend either the front or back edges of the collar by ¼". 

If you tightened the collar slightly, we recommend simply stretching it as needed when sewing to the neckline. 

To whatever degree you extend the circumference of the collar, though, you may wish to adjust the neckline. 

(Technically, since you're using cotton lycra, you could "cheat" and just stretch the neckline to accommodate the looser collar and probably nobody in the world would ever know it if you did it well.) 

If you wish to extend the neckline "properly," we offer the following suggestions: 

   * Cutting away ⅛" around the entire perimeter of the neckline will extend the seam line about ½". 

   * Letting out the shoulder seam slightly at the neckline will extend the neckline by four times the amount of your alteration (i.e. if you reduce the shoulder seam allowance from ⅜" to ¼" at the neckline, the compound effect will be the neckline extended ½"). 

   * An easy way to add ½" to the neckline would be to cut the front pieces ¼" wider at the center front, either along the entire piece or tapering out to ¼" wider from the chest to the neck. 

   * If you're utilizing the optional center back seam, you can easily add ½" to the neckline in the same manner as described above for the front. 

   * And, of course, these techniques can be used in any combination!


If your sleeves need lengthening or shortening, first determine if the bottom of the sleeve is comfortable around the upper wrist; if not, widen or narrow the sleeve as needed 1" from the bottom of the pattern piece (as the sleeve has 1" hem allowance). 

Once the bottom of the sleeve is adjusted (if need be), redraft the sleeve edges from the underarm (the widest point of the sleeve pattern piece) to the bottom of the sleeve.
If you widened or narrowed of the bottom of the sleeve, do the same for the hem allowance (the bottom 1" of the pattern piece).


The only other area that might need adjustment is the chest. 

The garment itself is made of stretchy knit fabric and should fit comfortably if worn at an appropriate size, but should it be too tight or loose, there are several simple options to achieve an ideal fit. 

First, the optional back seam allows for some give and take. 

Otherwise, if the garment is too loose, the body's side seams can be taken in (along with the upper portion of the sleeve seam) after it is already made. 

If it is too tight, extend the upper side of the pattern piece (at the underarm) by ¼ of the desired alteration on both the front and back pattern pieces, and widen the sleeve's underarm edges by the same amount (so the seam lines will match). For instance, if you need the garment to be 1" looser, add ¼" to the top of the front side seam (underarm), ¼" to the top of the back side seam (underarm), and ¼" to both sides of the sleeve underarm. 

The same technique can be used to adjust the fit around the waist. 


CONGRATULATIONS! 

YOU'RE FINISHED!


If you found this tutorial helpful, please support my costume research on Ko-Fi! :)


Tutorial, part 8 - Hem

Hem the undershirt bottom by turning the fabric under ½", then ½" again and edge stitching from the wrong side through all layers. (Being constructed of a knit fabric, the garment edges do not technically require hemming, but we do recommend hemming the undershirt bottom because it looks snazzier!)


Tutorial, part 7 - Sleeves and Close Sides

Sew the sleeve (piece C) to the body assembly, right sides facing, matching edges and sleeve center with shoulder seam. (The sleeve is symmetrical, so either sleeve piece will do; there isn't a specific front or back). 

Serge the seam allowances.


Repeat for the other side.


Sew the sleeve and body side seam closed in one continuous stitch, right sides facing, matching edges and sleeve/body seam lines. 

Serge the seam allowances and press them toward the back. 

Repeat for the other side.


Serge the bottom edges of the sleeve. 

Turn the sleeve's 1" hem allowance upward and press. 

Hem the sleeve by stitching close to the edge through both layers from the wrong side.


Repeat for the other side.


Tutorial, part 6 - Sleeveless Version

For the version WITH SLEEVES, skip to step 7. 

For the SLEEVELESS VERSION, sew the undershirt closed along the sides, serge the seam allowances, and press them toward back. 


OPTIONAL: Hem the edges of the arm hole by turning the fabric under ¼", then ¼" again and edge stitching from the wrong side through all layers. (Being constructed of a knit fabric, the garment edges do not technically require hemming, but we do recommend hemming the armhole openings for aesthetic purposes.) 


Tutorial, part 5 - Buttons and Buttonholes

Sew the buttons to the appropriate front panel (right front panel for men, left front panel for ladies) as indicated on the printed pattern, then sew corresponding buttonholes on the opposite front panel.

(Men's ENT undershirt pictured above)


Remember to flip your buttons over and use the undersides like the costume department did for the screen-used ENT undershirts!


(Thanks again, Michael Cowart, for observing and sharing this particular trick!)


It wouldn't hurt to go ahead and button the shirt at this point to ensure everything matches exactly.


Unbutton the shirt. 

"Stitch in the ditch" along the body/front panel seam line between the bottom of the undershirt and the fourth button(hole) from top to secure the "facing" to the underside of the garment.


Tutorial, part 4 - Front Panel/Facing to Body

Fuse the interfacing to the wrong side of your two front panel/facing pieces (piece J).


OPTIONAL: Although this wasn't done on the screen-used Reed ENT undershirt photographed and shared by Mike Paugh, we recommend serging the outer (longer, curved) edges of the front panels/facings for two reasons. First, it will help prevent the edges curling (as cotton lycra tends to do), which will in turn help prevent impressions of the facing edge being seen on the right side of the garment, and second, all the other interior edges appeared to be serged, so why leave out these edges? 


Prepare the shirt body assembly by turning it right side out.


Each side will be done separately, so we'll start with the right side. 

Fold the remainder of the shirt body assembly out of the way so only the right front is accessible.


Place the front panel/facing on top of the right front, with centermost edges flush and right sides together.


NOTE: Although the pattern pieces were drafted to precisely match, we've noticed that after interfacing the front panel/facings and lightly pressing the fronts, the front panel/facings sometime end up a little bit shorter than the front edges of the body! If you find this to be the case, don't panic! The important thing is that the facings are the same size as each other. If there's some excess at the bottom of the undershirt, just cut it off. You won't miss it.


Sew the front panel/facing to the front along the centermost edge. 

Serge the seam allowances. 

Press the front panel/facing toward center.


On the underside, press the seam allowances toward center.


Repeat for the other side.


Press the front panel/facing under on the fold line. 

(We're just pressing a crease for now, not permanently securing it.)


TIP: The fold line is 1 ¼" from the body/front panel seam line. 

TIP: Using a see-through ruler, mark the fold line with white tailor's chalk (testing on a scrap first to ensure it disappears when ironed, of course).


Once pressed, the front panel should be exactly 1 ¼" wide.


However, the distance from the fold to the raw (serged) edge of the "facing" should be exactly 1 ⅝" - that is, along the lowermost portion of it until it begins to curve outward toward the collar facing.


Repeat for the other side.


Unfold your front panels/facings.


Place the two facings right sides together along the center back (short) edges, then sew them together at the center back.


Press the seam allowances open.


Pin the "collar facing" (the upper portion of the front panel/facing) to the collar along the upper edges of each, matching center backs and right sides together.


To accomplish this, you'll need to fold the front panel back in on itself, right sides together, which may be a bit difficult since you previously pressed/creased it in the other direction. 

TIP: Ensure that the front panel remains exactly 1 ¼" wide by measuring from the body/collar/front panel seam line to the folded edge of the fabric and pinning in place before sewing. (It's okay for it to measure a tiny bit less than 1 ¼" to account for the resistance caused by the opposite crease you pressed earlier.)


Sew the "collar facing" to the collar along the top edges, reinforcing the stitch several times at the upper corners (where you started and stopped sewing). 

Remove bulk at the upper front by cutting out the seam allowances between the folded edge and the collar/front panel seam allowances.


Turn the facing back under, poking out the corners as sharply as possible and pressing the collar/facing seam line so it's nice and crisp. 

Press the folded edge of the front panel again.


OPTIONAL: Understitch the collar/collar facing seam allowances to the collar facing as far as possible. Unlike with the VOY undershirts and DS9/NEM division shirts, though, we actually don't recommend doing this, since the whole purpose of the undershirt's facing seemed to be to hide any interior construction details.


Your front panels should be exactly 1 ¼" wide.


TIP: Make sure they're the same (proper) width before continuing, adjusting and pressing as needed.


After (or perhaps, while) ensuring the front panels are exactly the correct width, pin the facings to the front of the body along the body/collar/front panel seam line.


Pin the "collar facing" to the back collar along the lower edges, matching center backs.


Secure the back "collar facing" to the back collar by stitching over the previous stitch line for a few inches in each direction of the center back. It doesn't particularly matter how far, but we generally recommend stopping approximately 1" before the shoulder seams.


The interior back of your undershirt should now look something like this.


Tutorial, part 3 - Collar to Body

Sew the collar (piece H) to the body assembly at the neckline, right sides together, matching front edges and center backs. 

Serge the seam allowances.


Tutorial, part 2 - Front to Back

If you chose the ENT undershirt with a back seam, sew the two shirt backs (piece B) together along the center back, right sides facing. 

Serge seam allowances and press to the right.


Sew the shirt front (piece A) to shirt back (piece B) at the shoulder, right sides together. 

Serge the seam allowances together and press toward back.


Repeat for other side.


Tutorial, part 1 - Pattern Pieces

Cut out the pattern pieces, as indicated on the printed pattern. 

(If you're making the sleeveless version, omit the sleeve pieces.) 


Required Materials, Supplies, Notions, etc.

FABRIC:

* Black cotton lycra = 2 yards

* Knit interfacing (ideally black) = 1 yard

We recommend using Pellon EK-130 Easy Knit, in black of course!


ACCESSORIES, NOTIONS, SUPPLIES, ETC.:

* 10 black buttons, ½" in diameter, 4 holes 

Rather than custom-made or hard-to-find buttons, it seems that the ENT undershirts used fairly standard, off-the- rack buttons, simply attached with the "wrong" side outward. 


A special (and grateful) shout-out goes to Michael Cowart for observing and sharing this particular trick!

* 1 spool of black thread

* Buttonhole sewing foot

* Serger


October 15, 2015

Misc. Observations, part 2b

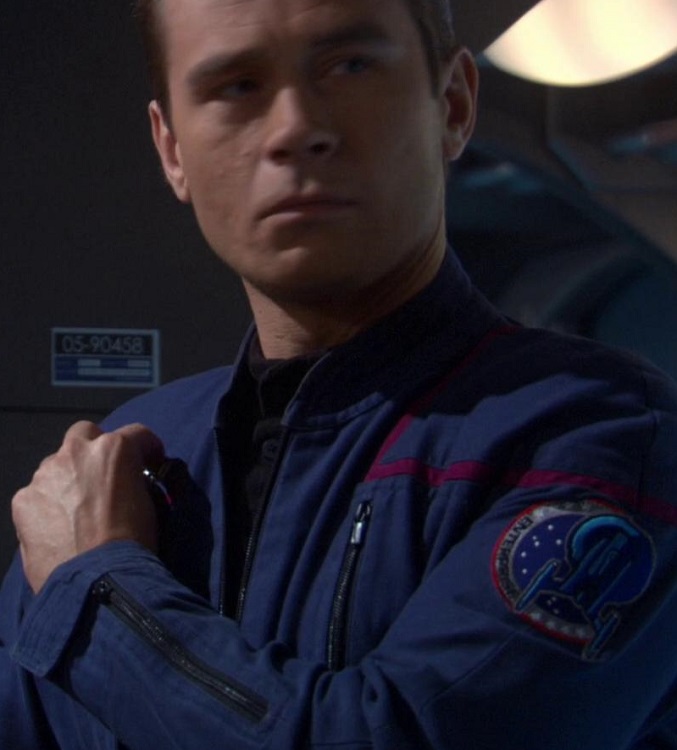
Archer wasn't the only one to begin wearing his undershirt partially unbuttoned during the third season; Trip did as well.

ENT, 3x1 "The Xindi"
ENT, 3x2 "Anomaly"
ENT, 3x2 "Anomaly"
ENT, 3x8 "Twilight"
ENT, 3x12 "Chosen Realm"
ENT, 3x14 "Stratagem"


ENT, 3x10 "Similitude"
Curiously, though, Sim wore his ENT undershirt fully buttoned.


Like Archer, Trip continued to wear his undershirt partially unbuttoned throughout the fourth season, although unlike Archer, he didn't make any pretense about wearing it otherwise.

ENT, 4x2 "Storm Front (part 2)"
ENT, 4x4 "Borderland"
ENT, 4x6 "The Augments"
ENT, 4x8 "The Awakening"
ENT, 4x14 "The Aenar"
ENT, 4x16 "Divergence"
ENT, 4x17 "Bound"
ENT, 4x22 "These Are the Voyages"


Like Archer, though, Trip did button up to show his respect for one of his heroes, the inventor of the transporter.

ENT, 4x10 "Daedalus"


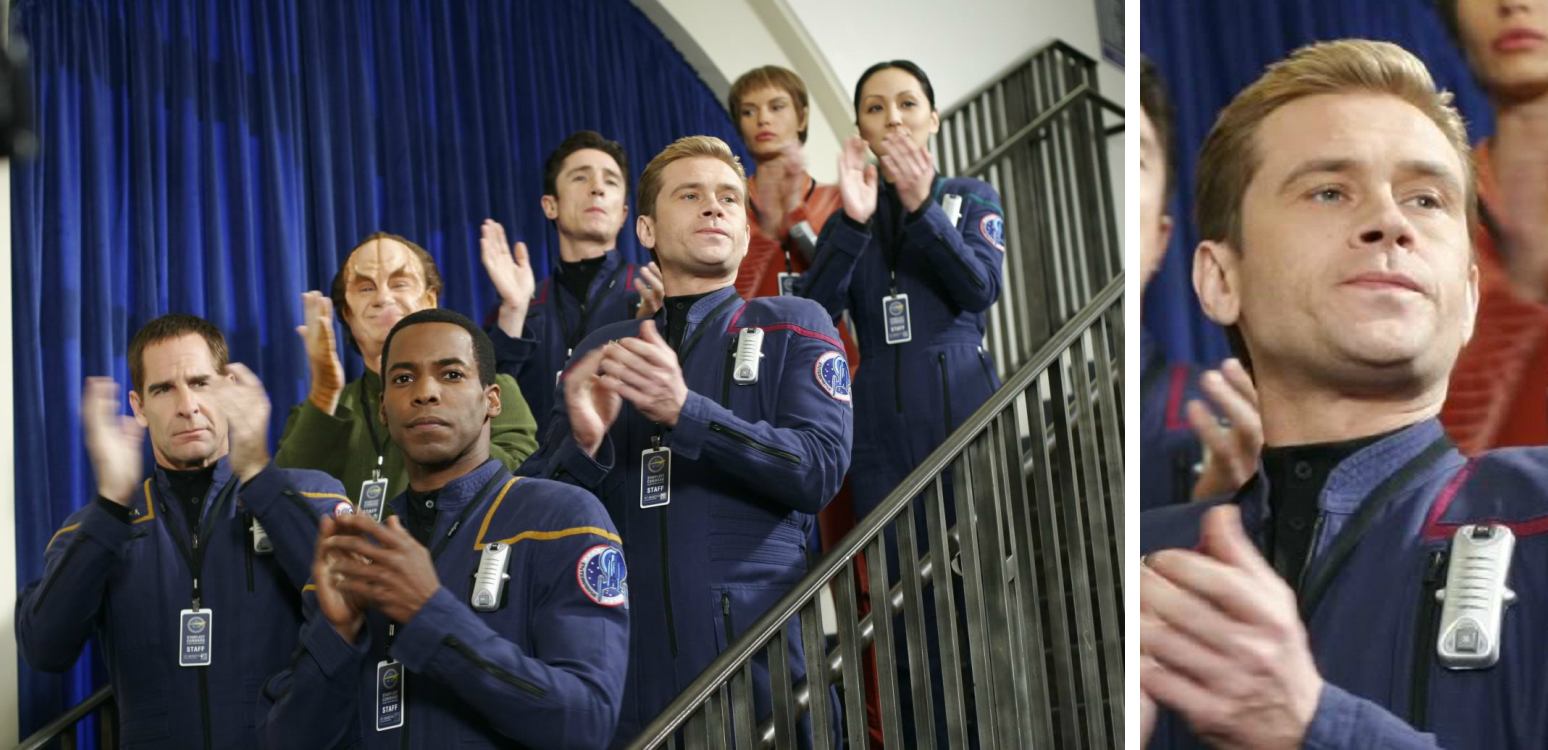
Trip also buttoned up for the pre-Federation meeting.

(publicity photo)


Hoshi started to catch on half a dozen episodes into season three, too ... note how in the episode "Exile," at the beginning she's all buttoned up but at the end she's unbuttoned like Archer.

ENT, 3x6 "Exile"


From that point on, she was on board with the new trend.

ENT, 3x9 "North Star"
ENT, 3x10 "Similitude"
ENT, 3x13 "Proving Ground"
ENT, 3x14 "Stratagem"
ENT, 3x20 "The Forgotten"
ENT, 3x23 "Countdown"


ENT, 4x5 "Cold Station 12"
She was pretty comfortable wearing her undershirt partially unbuttoned throughout the fourth season, as well.

ENT, 4x9 "Kir-Shara"
ENT, 4x11 "Observer Effect"
ENT, 4x12 "Babel One"
ENT, 4x16 "Divergence"
ENT, 4x20 "Demons"
ENT, 4x22 "These Are the Voyages"


ENT, 4x20 "Demons'
Like Archer and Trip, she did, of course, button up for the pre-Federation meeting.


I kind of wonder if Trip and Hoshi were just kind of following Archer's lead on the matter, doing what he did - you know, kind of like when your boss says it's "Casual Friday" or whatever. You just go with it.


ENT, 3x8 "Twilight"
Alternate future Captain T'Pol wore her ENT undershirt partially unbuttoned.


ENT, 3x17 "Hatchery"
T'Pol wore her ENT undershirt unbuttoned while dressed up in a full Starfleet uniform while attempting to distract Archer. (No comment ...)


Reed almost never wore his ENT undershirt partially unbuttoned - really only when he was teasing others around him with some eye candy (such as Trip in the lower left, or an Andorian lady in the lower right).

ENT, 2x12 "The Catwalk"
ENT, 3x13 "Proving Ground"


This fit with his character; as a dedicated officer, he probably always wanted to be prim and proper. 

He didn't bother when he was in the brig, though.

ENT, 4x15 "Affliction"


Perhaps the only main character to unbutton his ENT undershirt even less than Reed was Travis; he did a couple times during the first season, but we never saw him do it again until the final episode.

ENT, 1x4 "Strange New World"
ENT, 1x21 "Detained"
ENT, 4x22 "These Are the Voyages"


We find this a bit amusing, because Scott Bakula's (Archer's) ENT undershirts were apparently always long-sleeved and he unbuttoned his shirt the most often, whereas Dominic Keating (Reed's) and Anthony Montgomery (Travis') seemed to have an aversion to heat; their ENT undershirts were sleeveless and those two seemed to unbutton their ENT undershirts and/or shed some layers behind-the-scenes every chance they got.

ENT season 4 Blu-Ray special feature


Contrary to the characters they played, I bet those two actors would love to have been able to wear their ENT undershirts partially unbuttoned for comfort! 

Oh well - those guys are pros, though!


(publicity photo)
Lastly, Captain Hernandez appeared to always wear her ENT (er, COL?) undershirt "properly" buttoned.


ENT, 4x3 "Home"
ENT, 4x15 "Affliction"